Monday 29 December 2008

Happy 2008

I got this idea from Wendy at A Wee Bit of Cooking (only please don't compare the quality of my photos to hers'!). Like her, I've had a bit of an up and down year, but making this collage made me smile so many times that I can only conclude that the balance ended up in the right direction.


Happy new year to all, and may our 2009s have more ups than downs :)

A Kiwi anniversary

It's a whole year since Kiwi Family went Down Under which is very odd. It doesn't seem like a year although they have produced a whole new person since then which plots out the passage of time quite forcefully! We had a celebratory meal with the Ecos to mark the occasion since Kiwi Family are enjoying their new life so much and meanwhile we are a year closer to seeing them again :)


Of course I wanted to make something distinctively Kiwi to eat, but it's quite hard as an outsider to find things that are particularly Kiwi rather than antipodean more generally. New Zealand lamb would have been an option but since meat and air miles were off the menu that was a non-starter. I thought of a vegemite pie or stew, but apparently Kiwis tend to prefer our own Marmite (though tell that to Kiwi Sis, who has been missing her fix). When Kiwi Family first arrived Kiwi Bro's school organised a welcome ceremony with a meal cooked in a traditional pit oven or hangi, but I'm afraid I baulked at digging up the garden. However, I went to New Zealand myself in my gap year after university (when The Scientist was still far off the radar in The Other University in the Fens) and I do have some particular food memories of it, namely of sweet potato and pumpkin (and spirulina - green milkshake that tastes of banana - strangely addictive though it helps if you shut your eyes as you drink it). I don't think I'd ever had sweet potato (or kumara as the common variant there is called) before going to New Zealand and then we found it often in cafes, served as baked chips with sour cream and paprika. Yum. And I'd only had pumpkin once or twice before then as well, but met it often enough on my travels that my friend and I cautiously bought a wedge and made it into something or other one night in a hostel. This time I fancied something new on that theme and settled on a focal point of pumpkin gnocchi.

I must apologise now for the lack of photos of the gnocchi. They weren't too photogenic and I wouldn't want to put anyone off trying them themelves - they looked much better in real life :) I also wasn't very scientific in my method of making them. I defrosted the pumpkin and then heated it gently in a pan to drive off the excess moisture. I also added a bit of ordinary cooked potato to bulk it out. Then I added enough plain flour to turn it into a dough, and seasoned it with salt, pepper and some fresh herbs (I happened to have a winter variety pack which contained oregano and sage so I used that). I rolled the dough into balls and then put them in boiling water for five minutes or so until they rose to the surface. So far so good. The dough was, however, extremely gluey, no matter how much flour I added, and the best way to describe the cooked gnocchi was 'dense'. They certainly filled you up and I'm glad I'd only done five each. I served them with a cold sundried tomato dressing and it was nice to have something cold and fresh to lighten them up a bit. We also had sagey beans with them, some braised tofu which one of our hosts over Christmas had bought to feed me and donated me the leftovers, and some braised cabbage with caraway. None of those were particularly Kiwi - just the contents of our veg box this week. I would work on improving the gnocchi before serving them again but it was an interesting and varied meal :)


Dessert was easier to settle on - although there I was spoilt for choice. I chose a pavlova for two reasons. One is that it is quintessentially antipodean, although it almost certainly originated in Australia rather than New Zealand. It does, however, feature in the classic Kiwi Edmonds cookbook. The second is that it was also serving as a birthday cake for Eco Bro, and since they had a truly amazing pavlova at their wedding, I thought it was a nice personal link to them as well as Kiwi Family. I used a recipe from my Good Housekeeping cookbook and it was *really* good. Just make sure you give yourself a bit of time as the meringue cooks quite slowly and it needs to cool before it's topped. I was going to halve the recipe to feed four but we polished off the full sized one with no effort at all, to our calorie-laden shame. It's just a big meringue base topped with cream (I used half whipped double cream and half low fat Greek yogurt) and then fruit. Kiwi fruit would, of course, have been the obvious way to go but they are completely out of season here and I couldn't find frozen ones, so I used frozen fruits of the forest instead. They weren't completely defrosted when I served it up and we all agreed that we liked it that way. Eco Sis wants the recipe which is always a good indicator of a popular meal!

And so we enter the second year of Kiwi Family's Antipodean Adventure (and hence also the second year of this blog). I'm sure that their own celebration was a bit sunnier than ours but we think Vitamin D is over-rated anyway. Give us arctic windchill any day (are you missing Britain now?!)

Pavlova (from Good Housekeeping Cookbook)
Serves 8

Meringue
3 egg whites
175g caster sugar
1 tsp cornflour, sifted
1 tsp white wine vinegar
1/2 tsp vanilla essence

Line a baking sheet with non-stick baking parchment and draw a 23 cm circle on the paper. Turn the paper over.

Whisk the egg white in a bowl until stiff. Whisk in the sugar a third at a time, whisking well between each addition until stiff and very shiny. Fold in the cornflour, vinegar and vanilla essence. I was a bit worried about using a whisk to beat in the sugar for fear of losing the air in the egg white but it was fine and I just changed to a metal spoon for the cornflour etc. I used golden caster sugar which gave the meringue a very slightly darker hue.

Pile the meringue on to the marked circle, making a hollow in the centre. Bake at 130C/Has 1/2 for 1 1/4 to 1 1/2 hours or until slightly browned and dry but a little soft in the centre: press lightly with a finger to test. Mine was already quite brown at 1 1/4 hours and wasn't soft in the middle but it tasted just fine. Leave to cool slightly, then peel of paper. At this stage the meringue may crack and sink a little.

Filling:
300 ml (1/2 pint) double cream or half Greek yogurt (I used low fat) and half double cream
450g mixed fruit, defrosted (or mainly so) if frozen. Kiwi and passionfruit are traditional, but any seasonal fruit would work ok.

Whip the cream until thick, and if using, mix with the yogurt; spoon on top of the meringue. Top with the fruit, and chocolate curls if you like (I would have liked, but forgot. Sigh).

Tuesday 23 December 2008

Festival of Lights


Happy Chanukah!


Thursday 18 December 2008

Festive ginger fudge

I love making sweets - it's baking plus science equals something that makes your teeth want to curl up (but in a nice way). I made some vanilla fudge for my students at the end of the semester and while good, it was very crunchy. I'd used a Nigella recipe featuring evaporated milk, which is the unsweetened version of condensed milk. Since then I've seen a lot of very enticing recipes for gooey soft fudge on other blogs, including Cupcake Project's fudge with balsamic, Rikki's ingenious cashew-nut fudge, and Heidi's Fantasy-ish Fudge which looks beautiful but contains an ingredient I'm pretty sure is native to the American market only (what is ricemallow cream anyway?). I consulted with my fudge-loving friend Sam (she of the biscuit-receiving RAF boyfriend) and she thought that condensed milk could be the way to a fudgier fudge. I bought some condensed milk to put her suggestion into action but hadn't quite got round to doing anything about it when our veg box turned up this week with a recipe for vanilla nut fudge using simply sugar, butter and milk. Everything else I've made according to the directions of the lovely people at Riverford has been a stunner so I set the condensed milk aside for another occasion (Johanna's grubs, perhaps?) and got stuck in.


I don't like nuts and I couldn't find my second choice of glace cherries (they turned up later, reclining behind a barricade of sugars), so at the last minute I grabbed some glace ginger, and partnered it with some ginger liqueur instead of vanilla essence. I'm happy to report that the fudge was delightfully gingery - not too strident but deliciously tangy. The fudge was definitely fudgier than my last attempt though still a little way from the gooeyness I was envisaging - more of a cruncher than a chewer. I was pleased enough with it to package it up for two particularly special friends though - one is yet to go off in the post so I won't spoil the surprise - and the other was hand-delivered to best-friend Tracy to share with her other half and my Birthday Buddy (Almost Birthday Buddy is probably a little young at 5 months - he can have his own next year). She liked it very much and it was lovely to catch up with her today :) It travelled well and I think it will make a good postable gift as well :)

Ginger fudge (adapted from a recipe leaflet from Riverford Organics)
400g sugar (I used golden caster sugar)
125ml milk
50g butter
100g glace ginger
1/2 tsp ginger liqueur

1. Mix the sugar, milk and butter in the pan and heat gently until the sugar melts.
2. Turn up the heat to a boil and keep boiling and stirring until a sugar thermometer gets to 115C
3. Take the pan off the heat and stir in the ginger and ginger liqueur. Leave to cool for 2 minutes
4 . Quickly stir the mixture until it goes thick and creamy. Pour into a greased baking tin.
5. As the fudge begins to set, score the surface into squares. When it has set, cut into squares and store in an airtight container.

Monday 15 December 2008

Flying biscuits

Munchkin Gramps was a fan of Biggles books in his youth. He had a big collection of them and now regrets getting rid of them. In fact he's started collecting them again and he and Junior Bro read them together for a while - I'd be jealous if I hadn't been such a girly little girl myself. Since he was in between Biggles collections when we were young, all the name meant to Kiwi Sis, Eco Sis and I was a silly impression we would all do where we turned our hands upside down to make flying goggles over our eyes and pretended to zoom around with our elbows as the plane's wings (try it - you have to go 'zoooom' at the same time). That was the closest any of us got to wanting to fly a plane for real.


Not so my friend Sam's other half, who is an actual pilot with the RAF. I don't know if he ever ran around the house with finger goggles going zoooom, but he now actually zooms around in Harrier planes in Afghanistan. He'll be away over Christmas which is sad both for him and for Sam, and so she and I hatched a little plot to send him some extra little edible presents. I've never met Flight Lieutenant Sam's Other Half so am once again 'the mad baking lady'. I threw myself into research for this challenge so as to live up to my moniker, as the edible goods had to survive up to two weeks in transit and arrive a) edible, b) recognizable as something one might want to eat and c) festive. Eventually I found a recipe which looked sturdy, Christmassy, kept well - and most importantly, allowed me to make the most appropriate use ever of one my cookie cutters:


It's a Christmas flying biscuit! The original recipe (from cookie recipes online) describes the biscuits as lebkuchen, which name seems to cover any crisp German-style biscuit flavoured with Christmassy-type spices. These ones promised much from their ingredients list - warmed honey, spices, dried fruits, orange zest - and they delivered. They smelt *so* festive and I like the bits of cherry in particular. Apparently they are at their best two weeks after baking, so hopefully they will reach F. L. Sam's Other Half in their prime. Well, in taste at least - we have yet to see whether my packaging style will deliver them in the same number of bits I sent them in.

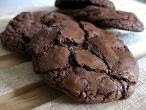
I'm sending these cookies to Susan from Food Blogga for her 'Eat Christmas Cookies #2' event. She's collecting recipes up to December 21st, and she's posting the entries as they arrive, so go and take a look!

Christmas Flying Lebkuchen: recipe here

Friday 12 December 2008

Feeling toasty

Last weekend I went to visit my friend Sam and we spent a lovely evening sitting on the floor in her living room with a glass of mulled wine each, chatting the night away in front of an open fire. Girly nights are such a restorative thing.


I'm sending this picture to this month's unorthodox round of No Croutons Required, which is featuring holiday pictures

Thursday 11 December 2008

The Great Cookie Research Project: The Winner!

Ah, it is the end of the semester. I have finished my teaching, I have completed my marking, I no longer have to get up at 6am on Tuesdays to get to Oxford in time for a 9am lecture. Bliss. I am even facing the prospect of finishing an article I've been working on for months. And the excitement that was the Great Choc Chip Cookie Research Project has come to an end.

So, which cookie was the winner? We had plain and simple, we had double choc, small and crispy, honeyed, gingery, cream cheesey (bit of a low point that one), Kiwi, biscotti, minty, and fruity. I went back through all the scores and can now announce that...[cue drum roll, flashing lights and nervous glances from contestant cookies, trying to compose themselves to look nonchalant and yet in need of your vote]....The Bonfire Night One!! Yes, the gingery treacley oaty moist one based on Den Lepard's Guardian baking column - that I forgot to add the chocolate chips to. The only one which was not actually eligible to be included in the contest has won the whole thing. But I don't care - it was the best and a ginger cookie just doesn't need to have choc chips to be a winner. Even when it's entered in a choc chip cookie contest. Its outstanding average score of 9.4 took it right to the top of the leader board, followed by the Senior Tutor's pick of The Boozy, Blonde and Fruity One, and the early favourite, The Double Choc One. My own personal favourite, The Mint Choc Chip One, came in fourth, but the winner was my close second preference so I'm happy too (as is The Scientist, who got to eat them again when I reprised them this week).


In the spirit of academic enquiry I thought a little bit more about what this project has revealed. Firstly, that my colleagues are very British in their tastes, consistently choosing crisp and crunchy over soft and chewy. On reflection I should really have called this the Choc Chip *Biscuit* Project. I like to think that this tells us something about resistance to the creep of American cultural hegemony. Secondly, everyone likes more chocolate rather than less (unless less means more gingery treacley oatyness). Thirdly that academics cannot leave semantics alone even when it comes to treats. The question of 'what is a 'cookie' seemed to perpetually exercise a few brains, though others were more than happy to let their tastebuds provide the data. I have also genuinely got to know some more people by becoming the self-appointed cookie fairy, and several other colleagues have expressed an interest in bringing in baked goods too. As long as I'm the one that gets to wear the wings and carry the wand :)


The Winner recipe here.

Thursday 4 December 2008

The Great Cookie Research Project: The Italian One

Feedback from previous weeks' cookies has indicated that my colleagues like chocolatey and they like crispy. No messing. So this week I thought I would pick up both of those themes and go in a slightly different direction from what we've had so far: chocolate biscotti. The distinctive thing about biscotti is that they are baked twice - once as a big fat log, and then again in individual slices, traditionally cut on the diagonal. You know - the long biscuits sort you buy in coffee shops to dunk in your coffee - the crunchy nutty chocolatey ones.


There are gazillions of recipes out there for biscotti and I've made some interesting lemon and anise ones before (from Moosewood - where else?), but my only foray into chocolate and nut wasn't so interesting. I settled on a recipe from Cafe Fernando blog in the end, as Cenk, its author, used to bake dozens of them every week and I thought that that was a good sign for a tried and tested recipe. These particular biscotti were hazelnut and chocolate though I did use a bit of a mix of chocolates - I didn't have enough plain dark so I chopped up the rest of the Maya Gold left from the Ecos' chocolate gingerbread and added that as well. You could really taste the orange even thought it was only half a large bar, which I thought was really nice. The dough was quite nice to work with as it wasn't too sticky so it was quite easy to shape into logs. I think I took them out of the oven very slightly too soon, as even after cooling some of the biscotti fell apart a bit as I sliced them. My logs were pretty wide though, so even half-biscotti (biscottini?) were a pretty respectable size.

Nut-studded biscotti dough

Now, I can't comment very extensively on these cookies as I don't like nuts so I didn't eat any. The dough tasted very good prior to the addition of the nuts, but the nutty taste permeated the cooked biscotti too much for me to want to try a bit. As they baked they went through a stage of smelling very nutty indeed but then seemed to move on through into chocolate. Of course all this is only a bad thing if you're a nut-hater like me - in fact if you're a nutophile it's a positive boon.
After the first baking

What with baking, cooling and baking again, the finished biscotti didn't come out of the oven until we were going to bed, so The Scientist didn't do his usual warm from the oven taste test. I left several at home for him though as I had too many to fit in the box to take to work, and he was pretty taken with them. He gave them an 8 out of 10, and wished he had a nice glass of vin santo to dunk them into. They did pretty well at work, too: 'Truly scrumptious!' said one person (possibly one of the Senior Tutors; possibly a character from an Enid Blyton book); 'Thank you. This cheered me up no end' was another rather sweet message. I never thought when I started this that I would be brightening up people's days! 'Very good. not too hard' said another, and 'good combination of nuttiness and chocolateness' came from someone else. One person found them a bit dry (I took the ones that were left to a meeting and it's certainly true that I could hear the crunching from the other side of the room - but that's what biscotti are supposed to do so it's not a bad thing), and another said that they weren't as varied in taste/texture as other weeks'. All in all they polled 7.75 - not reaching the dizzy heights but a perfectly decent biscuit and definitely a good one for dunking. If fact that's not really fair to them - if you're after home-made biscotti they were really very good (for a nut-liker!), and I think that quite a few of my tasters just happened not to have eaten anything like them before. They obviously don't get served up in library cafes!


The Italian One: recipe here

Tuesday 2 December 2008

Festive bakes: Nigella cakes

December has started and the run-up to the festive season has begun in earnest. I have to admit that I've been doing a little seasonal baking already though: there is a large jar of mince-pie filling in the fridge (I hate calling it 'mince meat' - bleurgh) and a Solstice cake maturing in a tin on top of the kitchen cupboards. These little gems are, however, probably The Scientist's favourite seasonal treat. Well, apart from Christmas pudding. And roast potatoes. And the pigs in blanket travesty I already mentioned. But these are right up there.


These cupcakes are actually just Nigella's Easy-action Christmas cake baked small. She calls the little versions 'jewelled cupcakes' but to us they are 'Nigella cakes', and I generally end up making lots around this time of year and stashing them in the freezer for when a whim for festiveness strikes. They're easy action because all the ingredients are just melted and stirred up together and then baked. They are the reason why I occasionally have chestnut puree around (though thank you so much, Johanna, for reminding me about the chestnut mousse cake I made a while back - I made a delicious improvised version with a lot less butter after reading your post on chestnut puree!). They're one of the easiest recipes for Christmas cake I've seen and, like all others, make the kitchen smell amazing. Plus, since the cakes are small they don't take too long to cook. I left these ones plain so they don't look too enticingly shiny, but Nigella suggests glazing them with some sieved jam and decorating with glace fruits and nuts. I sometimes do that too and it does make them look very jolly :)


This first batch of Nigella cakes of the year have disappeared already - they were for The Scientist's gaming weekend last week (where they were actually upstaged by another batch of the ginger parkin cookies, but that's just a sign of how good the cookies are. I think that The Scientist undersold them so as to leave more for himself :) )

Nigella Cakes (aka jewelled cupcakes, from Feast)
This is the full quantity recipe, but I often halve it to make about 12 fairy-cake-sized cupcakes. The full recipe is for a 20cm cake, or 24 small cupcakes

775g best-quality mixed dried fruit
175g unsalted butter
250g dark muscovado sugar
1 x 250g tin sweetened chestnut puree or spread (I use unsweetened and add sugar - the proportions are given on the tin)
125ml dark rum
juice and zest of 1 orange
zest of 1 lemon
3 large eggs, beaten
250g plain flour
1/2 tsp baking powder
1/4 tsp cinnamon
1/4 tsp ground cloves
1/4 tsp ground nutmeg

to decorate: 4 tbsp smooth jam, approx 150g assorted glace fruits and blanched nuts

Preheat the oven to Gas 2/150C (though you might hold off doing this until after the fruits etc have been set bubbling). Line the sides and bottom of a deep 20cm round cake tin with a double layer of greaseproof paper, leaving a cuff higher than the sides of the tin. Wrap a double layer of brown paper around the outside of the tin leaving a cuff double the height of the tin, tying with string. This gives some extra insulation to make the cake cook slowly. If making cupcakes try to use the foil liners which are thicker than the regular sort.

Put the dried fruit, butter, sugar, chestnut puree/spread, rum and orange juice and zests into a large wide saucepan and bring to the boil gently, stirring as the butter melts. Simmer the mixture for 10 minutes and then take it off the heat and leave to stand for 30 minutes, by which time the fruits will have been soused and the mixture cooled slightly. Now, add the beaten eggs, flour, baking powder and spices and stir to combine.

Pour the fruit cake mixture very carefully into the cake tin/s. Place in the oven and bake for 1 3/4 - 2 hours for the cake, or 35-40 minutes for the cupcakes.. The top of the cake/s should be firm and dry and will have cracked a little. A cake tester will still be sticky.

Put the cake on a cooling rack and take off the brown paper from around the outside of the tin. It will hold its heat and take a long while to cool, but once it has cooled completely unmould it from the tin and wrap in a layer of greaseproof paper and then foil until you want to decorate it. I just store the little cakes in a tin, or freeze them once they're cooled.

To decorate: warm the jam in a pan with 1 tbsp water. Cool. Paint the top of the cake/s with the cooled jam and then decorate with the fruits and nuts. Paint another layer of jam over the top to give a glossy finish.

Sunday 30 November 2008

Mini festive roast - The Scientist's roast potatoes

The festive season is absolutely The Scientist's favourite time of year. He's not religious at all, but he loves the food, the family time, the cheer and goodwill, the winding down after lots of hard work, and a glorious two-week period when the universities close and we just potter about together seeing our friends and family. It's been interesting finding out how different families celebrate the festive period since we've been together. Chanukah was always the main festive time for our immediate family, and that meant lighting candles, singing Chanukah songs, eating latkes and doughnuts, receiving chocolate pennies and other little treats I will no doubt write about in the next few weeks. For Christmas itself, however, we always went to Brighton to be with Munchkin Gramps' parents and that meant noise and games, lots of people, a seemingly effortlessly-produced roast dinner, stockings that had a tuppence, a satsuma and a walnut at the bottom, and lots of good cheer. Sometimes Chanukah coincided with Christmas and then there would be a menorah and a Christmas tree sitting happily side by side.

In The Scientist's family things are a little quieter because there are fewer of them, but they have lots of traditions too: a mini cooked breakfast with buck's fizz, which The Scientist's dad brings everyone in bed; some board games after dinner, a nice quiet lunch and some chilling out. In years gone by I think that the afternoon was generally taken up with watching new videos, but that was in a teenage-Scientist era, and he's prepared to wait until we get home again before ripping the plastic off his new dvds nowadays! Dinner at his parents' house features the weirdity that is pigs in blankets - I had never even heard of these before I met him and still regard them with some horror (mini pork sausages wrapped in bacon - wrong on so many levels). At our house roast parsnips are a must. Chez elder Scientists a trifle (also made by Scientist Dad) is traditional on Boxing Day - for us it was Granny T's meringues which were always kept in a round tin on top of the kitchen cupboards.

My mini-Christmas dinner: bulgar-stuffed peppers, roast potatoes, peas and some stuffing lurking at the back

In our years of being together we have amicably alternated Christmas Day between our families, each of us willing to forego our pigsinblanketshorror or parsnips for the other. We have even hosted the meal ourselves a couple of times, and in doing so, The Scientist has become something of an expert in making roast potatoes. He started by quizzing Grandma S, who produces crispy yet soft delights after a Delia recipe. A few efforts on and he was starting to apply science to the effort, considering the heat of the oil and the effects of evaporation on the potatoes. His epiphany, however, was seeing a Jamie Oliver programme last year, where his opinions on flavouring the oil were set. So when I suggested that we should have a little mini festive roast dinner for the two of us in order to set the season going well he was certainly up for reprising his best roasties. Here's how he does it, Scientist-style:

Chopping

First, chop the potatoes into cubes (don't you like the precision with which he's lined them up? His moniker is well-earned). He just uses baking potatoes - I think he aims to be precise in his method but fairly easy going in the exact raw materials.

Shaking

Pre-heat the oven to about 180C (this can be flexible according to whatever else needs to be cooked alongside). Par-boil the potatoes for 10-15 minutes until just soft. Drain them, and then shake them about roughly in the pan. This fluffs up the edges which makes them absorb the oil more easily and helps give that lovely crispy outer layer. Now allow them to sit for another 15 minutes or so so that the excess water can evaporate off. This leaves less water for the fat to interact with, apparently.

Pour some oil into the base of a roasting dish. The Scientist used a couple of glugs to make enough potatoes for the two of us - enough to give the bottom of the pan a coating but we're certainly not talking about making the potatoes swim in it or anything. Add some seasonings to give the oil a nice flavour. The Scientist favours several smushed cloves of garlic and a scattering of rosemary and some salt and pepper but the possibilities are almost literally endless. At Christmas when there are often more fresh herbs lying about for various other projects he uses fresh but dried ones do fine. Sit the whole pan over a large gas ring and heat it until the oil is hot - the garlic will be sizzling.

Coating and roasting

Now add the potatoes and stir carefully to coat them all in oil without breaking them up. Put in the pre-heated oven and roast for about 45 minutes, checking and shaking about every so often. I should note here that in contrast to my usual last-second rearrangements of the hot oven shelves before sticking dinner in, he considers where everything will go in advance and moves the shelves accordingly. This is possibly why my hands are much more tolerant to heat than his, but also why roast dinners are generally cooked in a much calmer atmosphere than my efforts at entertaining :) Forty five minutes later, and voila - crispy on the outside, soft in the middle, thoroughly flavoured roasties with some nice bonus cloves of soft smushed roast garlic to bite into as well.

Ta-da! Mountain of successful roasties accompanied by roast pepper, stuffing, a couple of peas (more hiding under the rest!) and, appearing only under sufferance on a vegetarian blog, roast chicken

The Scientist is pretty traditional in what else he serves in a roast dinner, but also happy to be flexible over veggies and more than happy with gravy and stuffing out of a packet. He is actually wonderfully easy to please - as long as there's lots of it! Tonight he had some roast chicken, some roast peppers because that's what I was cooking for my bit, some peas, gravy and stuffing. I had a roast pepper half stuffed with bulgar wheat, sundried tomato, capers, peas and a sprinkling of goats cheese which suited me very well - I don't really like huge dinners (especially after an afternoon of baking bread which had involved nibbling lots of bits on the way!).

The microwave Christmas pudding resting after cooking

Christmas dinner is, however, not complete without dessert: Christmas pudding is The Scientist's favourite dessert (perhaps alongside apple pie and lemon meringue pie). I was quite surprised to realise that he'd been so preoccupied with making sure he had all his savoury ingredients that he'd forgotten to buy a mini pudding for tonight's dinner. Thankfully I know my way around a good food blog search, and turned up a recipe for microwave Christmas puddings. We would normally serve our pudding with cream but we only buy that when there's an occasion and so The Scientist settled for an acceptable second of custard. The pudding was pretty nice - I didn't think that I'd be competing with Mssrs M&S any time soon but The Scientist pronounced himself satisfied and said that while it had a lighter taste than the long-matured ones that that was quite nice.


So here we are, on the eve of December, and with our first festive roast under our (loosened) belts already. I'm sending this mini Christmas dinner to Johanna at The Passionate Cook for this month's Waiter, there's something in my.... which is featuring roasts.

Chocolate spice gingerbread - or, my ongoing obsession with the word treacle

I really seem to be unable to resist the idea of ginger and treacle in baked goods at the moment. I think I've said before that gingerbread didn't particularly play a part in our childhood traditions - we liked a bit of Jamaican ginger cake all right, but we didn't have it often. So I really can't explain where this yearning comes from - but if it gives me an excuse to say 'treacle' more often then I'm not going to try to fight it. This particular cake won me over by combining treacle and ginger with chocolate - and fairtrade Green and Black's chocolate at that. The recipe was from a Green and Black's book I bought second-hand after flicking through it in a shop and lusting after all the photos (it was the picture of the pear and chocolate spread which particularly won me over though I haven't made that yet). I came back to this recipe as I wanted to take a cake to the Ecos for dinner on Friday night (thank you for a lovely evening, and especially that amazing Moroccan soup, which, I have just realised, I dreamt about last night!). Eco Sis likes gingerbread too, and this one was advertised as being 'wonderfully moist'. The moistness must particularly come from adding chopped prunes, I think. I wonder if chestnut puree might have a similar effect though it might change the flavour of the cake. It also has buttermilk in it, and since I rarely buy buttermilk I used milk with added vinegar which seemed to work fine (please note that this is an accepted way to make buttermilk, Eco Sis - I didn't just randomly take liberties with your cake!).

Yummy cake; poor lighting :(

I will make this cake again. It contains fair trade orangey chocolate, it contains treacle and ginger, it contains prunes (which I love), it is dense and moist and dark brown in colour, it wrapped and travelled well, it got a rapturous response from Eco Sis: what's not to like? Interestingly, Eco Sis didn't pick up on the ginger immediately but it was because she was intrigued to guess what the moist little flecks she could see were (the prunes). Once I told her what it was she said she could definitely taste both ginger and chocolate. It was harder for me to assess fairly since I knew what was in it but I thought the combination of ginger and chocolate worked really well, especially with the added richness of the prunes.

Clearly not chocolate ginger cake, but so cute as to be almost edible, and sort of chocolatey coloured. She's wedged herself in a very small space between me and The Scientist on the sofa, and is lying on one of our legs each!

Although this wasn't previously a family favourite this cake went down so well with the Ecos that I am sending to Not Quite Nigella for her Ultimate Chocolate Cake Challenge.

Chocolate Spice Gingerbread (from the Green and Black's Chocolate Recipes cookbook)
125 g unsalted butter
50g Maya Gold or other good-quality dark orange chocolate, broken into pieces
50g dark chocolate, minimum 60% cocoa solids, broken into pieces
75g dark muscovado sugar
4 tbsp treacle
150ml buttermilk
125g ready-to-eat prunes
175g plain flour
1 tsp bicarbonate of soda
2 level tsp ground ginger
1 level tsp cinnamon
1 large egg, lightly beaten

Preheat the oven to 160C/325F/Gas 3. Line an 18cm square cake tin (I used a standard loaf pan) with greaseproof paper or baking parchment

Cut the butter into cubes and place in a heavy saucepan along with the chocolate, sugar, treacle and buttermilk. Heat gently until the ingredients have melted, then set aside to cool.

Snip the prunes into small pieces with the kitchen scissors. Sift the flour into a large bowl along with the bicarb of soda and spices. Pour the chocolate mixture into the bowl and beat thoroughly with a wooden spoon, then add the beaten egg and beat again. Fold in the prunes.

Pour the mixture into the prepared tin and level off the surface using a palette knife. Bake for about 50 mins. Remove from the oven and leave to cool in the tin for about 10 mins. Turn out onto a wire rack and leave to cool completely. Wrap in greaseproof paper and store in an airtight container.

The cake will keep for a week in an airtight container. It is best eaten the day after it is made.

Thursday 27 November 2008

Storecupboard eats - sagey beans

I'm still making my way through my overstocked storecupboard (I haven't got to the kamut yet, but I'm contemplating it), and supper tonight featured the latest target: cannellini beans. The dish was inspired by a pack of fresh sage on sale in the supermarket and it's one of the simplest and healthiest dishes I've ever made. I used dried beans which meant some planning and soaking but I've made it before with tinned ones and then it really is tin to plate in five minutes. It's yet another recipe from Moosewood (please, someone, buy it on the strength of all the recipes I keep posting or I'm going to feel really bad. If I ever make it to New York State I will go and spend a lot of money in their restaurant, I promise). It's called Tuscan Beans with Sage, and it's just a matter of combining sage with garlic and a little oil in a pan, adding some tinned tomatoes, lemon juice and the beans, and warming through.


We're both out tomorrow night - The Scientist on another gaming jaunt (it sounds as though he's practically moved in with his gaming buddies from this blog but in fact it's just two weekends in quite close succession - the tales of baked goods just expand to fill a lot more posts), and I'm going to spend the evening with the Ecos (hello :) ) So we moved our Friday night flump-out dinner to Thursday and had sausage and chips - and the healthiest bean dish you could imagine, plus broccoli. Guess who picked what? There was so little fat on my menu that I added some chips just to make sure I didn't fade away as I ate. Chips, sagey beans and broccoli went together surprisingly well, though I felt that the beans needed a bit more zip to them. I had so much faith in the fresh sage that I probably didn't add enough pepper. The recipe notes say that you should definitely use fresh and not dried, and the dish gets its name from the sage that grows wild in Tuscany. I love the image!

To go with the beans I tried a new way of cooking broccoli (also from Moosewood - I'm so unoriginal). This one was also a cinch but it was a really good balance of flavours. Just bring some water to the boil with some minced garlic and soy sauce, marvel briefly over how funny the word 'minced' is, and then add the broccoli until it's tender. I left the lid on to help it steam as well, and it was really nice. We've had so much broccoli in our veg box that I'm pleased to find some new ways to cook it.

Since this plate of tastiness is all vegan, I'm sending it over to Tasty Palette's Vegan Ventures#2 marking National Vegan Month.

Tuscan Beans with Sage (from Moosewood Low Fat Favourites)
Serves 4 to 6

1-2 tbsp chopped fresh sage
6 garlic cloves, minced (hee hee) or pressed
1 tbsp olive oil
2 1/2 cups chopped fresh or canned tomatoes
1 1/2 tbsp fresh lemon juice
3 cups cooked cannellini beans (two tins, or 1 1/3 cups dried)
salt and pepper, to taste

Combine the sage, garlic, and oil in a saucepan and saute on medium-low heat for several minutes, until the garlic is golden. Add the tomatoes, lemon juice, and cannellini and continue to cook for about 10 minutes, until everything is hot. Add salt and pepper to taste. Serve immediately or chill to serve later.

Tuesday 25 November 2008

Pumpkin goulash


A few weeks ago I received a lovely package of goodies from Hungary and Germany courtesy of Aniko at Paprika meets Kardamom via Stephanie's Blogging by Mail event. Aniko was sweet enough to send me a few of her family's traditional recipes which feature some of the ingredients she'd sent me, and we were immediately taken with the one for pumpkin goulash. Goulash is one of The Scientist's specialities, which he has vegetarianised since living with me. I'd never had it before tasting his so I didn't know exactly what characterised it. His version is a tomato-based vegetable stew (or vegetable and meat in its original incarnation) with paprika in it. We were surprised to find that Aniko's didn't have tomato in it, but a glance at a well-known source I would never endorse my students using shows that it's not a vital ingredient. In fact, according to said source, goulash is a meat and vegetable stew or soup which includes paprika and then a variety of other optional ingredients one of which is tomato. So Aniko's goulash wasn't goulash as we had known it, but we were game to try her more authentic version.


The pumpkin Aniko uses is patisson which isn't one I've come across, but the picture she included shows quite a flat and flower-shaped gourd. I think we'd call it a patty squash. I usually cook with butternut squash or another small one like acorn - or even the cutely and appropriately-named Munchkin squash. When I made this goulash I used a kabocha squash which I found at one of my favourite farm shops and which I'd never had before either. It had quite a different texture from our usuals - not quite as compact or soft, and the flesh was a little chunkier. Anyway, the goulash was pretty quick to make and the only change I made from Aniko's original was that I used yogurt instead of creme fraiche. It tasted really different from The Scientist's goulash as it was yogurty not tomatoey but we both liked it very much. Another time we will use more paprika - we're used to the smoked stuff and so I was cautious in how much I used and it could definitely have had a little more. Thank you Aniko for sending us both a new twist on an old favourite dish AND the keynote ingredient to make it!

Pastiszonporkolt - Pumpkin goulash (from Aniko of Paprika meets Kardamom)
Serves 4

1 medium Patisson squash, or other hard-fleshed squash (I used kabocha)
2 onions
2 tsp ground paprika (sweet)
3 tbsp olive oil
salt and pepper
water
100g creme fraiche (I used plain yogurt)
1 tbsp plain flour

1. Halve and peel the squash and cut into 2cm cubes. Peel the onion and dice them.
2. In a pan heat the oil, add the diced onions and saute it for about 5 minutes on medium heat. Add the paprika and stir well. Put back on the heat and immediately add the squash. Don't let the paprika heat for too long or it will get bitter.
3. Season with salt and pepper (Aniko notes that patisson squash needs quite a bit of salt). Add enough water to almost cover the squash. Put on the lid and let it simmer for 20-30 minutes. It will change in texture when it is done (I tested it for softness with a knife)
4. Mix the creme fraiche and flour. Stir into the goulash and let it cook for a few more minutes until the sauce thickens (I did this but we thought it actually probably didn't need the flour which you could taste a little in the sauce). Season to taste. Serve immediately.

Aniko's serving suggestieon: with potatoes and pickles.

Sunday 23 November 2008

The Great Cookie Research Project: The Mint Choc Chip One

We're nearing the end of the Great Choc Chip Cookie project now - only two more weeks and then the great unveiling of the winner. I had planned a different cookie for this week but by the time I got home after a VERY long day last Tuesday I couldn't face firing up the laptop to get the recipe. So I had a last-minute swerve inspired by a box of mint Matchmakers I had bought and stashed to bring out at Christmas time. Mint and chocolate are a happy marriage, I thought - let's put them together in a cookie.

For the actual cookie base I turned to a book I bought on Johanna's recommendation - The Search for the Perfect Chocolate Chip Cookie. It features recipes entered for a competition sponsored by a Massachusetts inn of all places, and while many are variations on the same theme others are really quite intriguing (ice cream as a cookie ingredient anyone? I really want to give that one a go). I turned to the double chocolate section and was saved from the usual indecision and procrastinating by one marked 'Grand Prize'. Excellent. The choice was made.


I followed the recipe exactly except that I left out the nuts and chocolate chips and instead stirred in a whole box of broken up mint matchmakers (I don't know if these are peculiarly British - they are crispy minty chocolate sticks and they always make me think of our friend Vet Mum, who loves them. If you're reading, Vet Dad, tell her I will reprise the cookies for her!). For once I managed not to forget some vital ingredient, and was rewarded with the most amazingly moist, chewy, chocolatey cookies. The mint was a superb addition to the taste, and even I, who usually shuns the baked cookies for the batter-y mixing spoon, was smitten. In fact I went through every trick in the baker's book - that one needs trimming, oh dear, a bit fell off that one, etc etc. I would rank them at the top of the tree with the ginger parkin ones from a few weeks back. The Scientist wasn't in that night to do his oven-fresh tasting, but he was very taken with them when he got back the next day. The recipe made a lot of cookies and so I'd left him four or five and they were all dispatched pretty promptly. He gave them a 9 out of 10 (and bear in mind that he feels that 10 represents so nirvana-like a perfection that it can scarcely be contemplated. He is the Craig Revel-Horwood to my new taster in the English department's Bruno Tonioli).


The tasters at work were not quite as rapturous as I was but they did like the cookie and it polled an average of 8.1. One got hung up on the definitional issue again - she said that she liked it very much but that if she wanted an After Eight she'd have an After Eight. The Senior Tutor compared them more favourably with a mint Aero, while someone else said they tasted like toothpaste (which I don't think is a good thing in a cookie). My favourite response was from the aforesaid English lecturer, however: 'yum yum in my scrum'. A hit there, I think.

The Mint Choc Chip One (adapted from The Search for the Perfect Chocolate Chip Cookie)
1 3/4 cups flour (I used plain)
1/4 tsp bicarbonate of soda
1 cup butter or marge, softened (I used marge)
1 tsp vanilla extract
1 cup granulated sugar (usually I bake cookies with caster sugar but I happened to have granulated and so used that. The cookie did have a nice graininess to them but it's hard to say if it was from the sugar or the matchmakers)
1/2 cup dark brown sugar, firmly packed.
1 egg
1/3 cup unsweetened cocoa
1 tbsp milk
1 box mint matchmakers broken into small bits (the original recipe had 1 cup chopped pecans or walnuts and 1 cup semisweet chocolate chips)

Combine flour and bicarb, and set aside
Use an electric mixer to cream butter. Add vanilla and sugars, and beat until fluffy. Beat in egg. At a low speed beat in cocoa, then milk. With a wooden spoon mix in dry ingredients until just blended. Stir in broken matchmakers.
Drop by rounded teaspoonfuls onto nonstick or foil-lined baking sheets. Bake at 350F for 12-13 mins. Remove from oven and cool slightly before removing from baking sheets
Yield: 3 dozen

Thursday 20 November 2008

Gingered ginger biscuits with ginger

I teach my first-year module at 9am on Tuesdays and by this stage in the semester the students are looking pretty bleary eyed and unwilling to engage their brains when we meet. I'd love to tell them that I feel the same after waking up at 6 to get there to teach them, but instead I negotiated with them last week that if they came to this week's workshop ready to participate I would bake them some biscuits. This could otherwise be seen as bribery but I've decided that it's not. No reasons - it's just not, ok?


I don't know what drew me to ginger biscuits - I think perhaps it was the success of the gingery choc chip cookies a few weeks ago. I have discovered that crisp biscuits survive their journey to Oxford by bike and train much better than soft ones (which manage to weld together no matter how carefully I pack them). Cupcakes and muffins are a no no because they take up too much space to carry, and anything decorated will arrive looking less than edifying. So crunchy ginger biscuits it was. I found an interesting-looking recipe on Book the Cook's blog - interesting because it included ground ginger, stem ginger, AND the syrup from a stem ginger jar. It also contains oats and golden syrup which make all biscuits immediately more enticing (to me anyway!). Not content with the triple ginger presence, I also grated some crystallised ginger on to the top for a bit more tang and sparkle. You see Sugar High Friday this month has 'All that glitters' as its theme, and I thought I would give a little crystallised glitter to my biscuits.


I can't say that the biscuits sparkled my students to new levels of insight and interaction but I think they did appreciate them. I said that it was their chance to mark my efforts instead of the other way round but they didn't take as much advantage of the opportunity as I thought they might. They were probably all too sleepy/hungover/insert other student stereotype here.

Gingered ginger biscuits with ginger (based on Book the Cook)
Makes approximately 20

125g self-raising flour
2 tsps ground ginger
4 chunks of crystallised ginger, finely diced [the original uses 4 stem gingers]
3 tbsp syrup from a jar of stem ginger
50g oats [I used half oats and half millet flakes]
50g dark muscovado sugar
75g butter or margarine
More crystallised ginger for grating

1 - Preheat the oven to Gas 5, 190 degrees C.
2 - In a large bowl, sift in the flour and ground ginger. Mix in the oats, sugar and crystallised gingers, then add the butter and rub until it resembles large breadcrumbs. If it is a little dry, add more butter.
3 - Finally, add the syrup and combine thoroughly. You should be left with a semi-soft dough.
4 - Roll out onto a floured surface about 1cm thick, and cut out your shapes. Place onto a buttered baking sheet and grate some more crystallised ginger over the top. Place onto a high shelf. Bake for 10-15 minutes until golden brown. Leave to cool on a wire rack. Apply to students and wait for insightful participation.

Monday 17 November 2008

Tomato soup with Israeli couscous

I first came across Israeli couscous (funnily enough) in Israel where my reaction to it was only bemusement that Israel Grandma was referring to such a funny, thick, pasta-esque food as couscous. We just ate it boiled and it was pretty nice, but when I got back I suddenly started wanting to revisit it. You see, M&S do a delicious roasted squash and Israeli couscous salad - but they don't sell the couscous on its own. After looking in every ethnic supermarket I passed I had almost given up when where should it turn up but at the wonderful Bill's in Brighton! I bought some and used it up pretty quickly in salads. Luckily I stumbled upon some more in a more mundane location - Munchkin Granny's local Tesco - and stocked up. So when Lisa and Holler announced that this month's No Croutons Required was based on pasta soups I thought immediately of my inappropriately-named little friends.


It seems appropriate, although completely coincidental, that I found my inspiration in my Jewish Traditions cookbook - a tomato soup with Israeli couscous. I don't make brothy soups very often but the picture of this one looked so enticing that I made it exactly as it suggested (except for skipping the mint which I don't like). It was really quick - I put it all together after coming back from the gym and was eating within half an hour of coming through the door. It was tasty, brothy, spicy and chewy which I thought was a pretty impressive set of adjectives for such a simple soup. You could use any pasta but I did particularly like the small chewy 'mouthfeel' of the couscous - think barley but made of pasta if that makes any sense.

Tomato soup with Israeli couscous (from Jewish Traditions cookbook)
The only changes I made were to halve the quantity, use much less oil, leave out the mint and throw in a random ripe tomato with the tinned ones. This is the full and original version.

Serves four to six

2 tbsp olive oil
1 onion, chopped
1-2 carrots, diced
1 tin chopped tomatoes
6 garlic cloves, roughly chopped
2 1/2 pints veg stock
200g-250g Israeli couscous
2-3 mint sprigs, chopped, or several pinches of dried mint
1/4 tsp ground cumin
1/4 bunch fresh coriander or about 4 sprigs, chopped
cayenne pepper, to taste
salt and ground black pepper

1. Heat the oil in a large pan, add the onion and carrots, and cook gently for about 10 minutes until softened. Add the tomatoes, half the garlic, the stock, couscous, mint, ground cumin and coriander, with the cayenne pepper, salt and pepper to taste.

2. Bring the soup to the boil, add the remaining chopped garlic, then reduce the heat slightly and simmer gently for 7-10 mins, stirring occasionally, or until the couscous is just tender. Serve piping hot, ladled into individual serving bowls.

Sunday 16 November 2008

Mushroom and barley soup


I spent last Sunday in a lovely haze of pottering. The Scientist was still away at his gaming convention and I used the time to catch up on some sewing, some tidying - and a little mushroom indulgence. This mushroom and barley soup is a Moosewood favourite I've made before, but not for some time. It's quite long on preparation time - you need to pre-soak the dried mushrooms and then prep the veggies before leaving the whole lot to cook for 45 minutes, but as long as you're a bit organised it's not much actual effort. It's a light and brothy soup which isn't my usual leaning, but I love the chew of the barley and the mushrooms and they'd be lost - or at least something else entirely - in a blended thick soup. The mushroom soaking liquid become the basis for the stock as well, so it's all nice and flavoursome. I made it for lunch and got on with my latest quilt project while it was simmering. I burnt my mouth on it because I like things very hot, but forgot just how hot brothy soups can be!


Dried mushroom soup with barley (from Moosewood Low Fat Favourites)
Serves 4 - 8

2/3 cup dried mushrooms
6 cups boiling water
1 tsp veg oil
2 cups chopped onion (2 onions)
2 garlic cloves, pressed or minced
1 cup finely chopped celery (3 stalks)
1 cup peeled and finely chopped carrots (2 medium)
3 cups sliced mushrooms (about 10oz)
1/4 cup soy sauce
pinch dried thyme
1/4 tsp ground black pepper
1/2 cup raw pearl barley
1/4 cup dry sherry or 2 tsp honey (optional - I omitted it)
salt and pepper, to taste

Ina saucepan, cover the dried mushrooms with 6 cups of boiling water. Simmer for 15 minutes. Remove from the heat and set aside for at least 15 minutes.

Meanwhile, warm the oil in a soup pot on low heat. Add the onions and garlic, cover, and cook for 5 minutes, stirring occasionally. Add the celery and carrots and cook for 5 minutes, stirring occasionally. Add fresh mushrooms, increase the heat to medium, and cook, stirring continuously for about 3 minutes, until the mushrooms begin to release their juices. Remove from the heat and set aside.

Drain the dried mushrooms, reserving the mushroom stock. Cut off and discard any tough stems, then rinse and chop the mushrooms. Strain the stock through a sieve or a paper filter. Add enough water to the stock to make 7 cups of liquid. Add the chopped dried mushrooms, mushroom stock, soy sauce, thyme, pepper, barley, and optional sherry or honey to the pot sauteed vegetables. Bring to a boil and then cover, reduce the heat, and simmer for 45 minutes.

When ready to serve, add salt and pepper to taste. Add more water if it's reduced down and become too thick.

Saturday 15 November 2008

The Great Cookie Research Project: The Kiwi One

Hmm, mid-week is not really happening for this blog at the moment - I blame teaching and commuting commitments. However, the Great Choc Chip Cookie Research Project is continuing, and this week I went Down Under for some inspiration. Since Kiwi Sis and family went off on their antipodean adventure I've started following a few New Zealand blogs to try to get a little insight into the sort of foodie world they're living in. A while back the talented cookie-decorator (oh, and full-time lawyer too) Tammy posted the recipe for her family's favourite choc chip cookies, and I was interested to see that they contain condensed milk. This isn't an ingredient I use much, apart from the odd foray into fudge or caramel making, but it struck a chord as Johanna uses it in baking quite often, and has written a very interesting post about its place in Australian cuisine. Non-perishables in tins formed a vital staple in people's diets in an era before domestic refrigeration and especially since Australian cities were so dependent on rail links for their provisions. Unfortunately it was also used to feed babies on sometimes which is clearly Not a Good Thing. Johanna has posted about several tasty treats which use it as a base ingredient, and so I was particularly struck that it turned up in this New Zealand recipe as well.

I had half a tin of condensed milk left over from making Eco Sis's Millionaire's Shortbread, and so I made up a batch of Tammy's cookie dough the same weekend and put it in the freezer. I *almost* forgot to add the choc chips AGAIN when I defrosted it, but remembered just in time to whip the shaped cookies back out of the oven. But I did totally forget to photograph them - see above excuses which are currently being deployed to explain all incidents of ditsiness and general rubbishness. Luckily Tammy has posted a picture of them on her blog, although I have to admit that mine did not look as good as hers. Mine were flatter, for one thing - because the dough was still quite chilled from the freezer I was able to roll it into balls and flatten them rather than drop them on the tray as I usually would. I hadn't particularly intended to do this - it just seemed like the thing to do at the time. It meant that my cookies were crunchy which was actually very nice, but they also looked a little burnt around the edges. Initially I was cross about that but then we realised that the darker-ringed ones actually had a nicer crunch to them and I even put the more golden ones back in again to crisp them up some more. I think that the flatness of the cookie had a lot to do with this, but also our oven has a tendency to get quite hot, and these cookies are supposed to be baked at a slightly lower temperature than many of the other recipes I've tried.

The slightly burnt look (I prefer to call it 'sun-kissed') made the cookie less popular at work. They didn't rate terribly well although I really think that this is because of the way I baked them. Tammy's looked much thicker and chewier (and frankly quite a bit more appetising!) than mine. A number of people only gave them a 3 though they also racked up an 8 and a 9, but I was really touched by the comments. One person put 'personal preference is for softer cookies - but delicious and very welcome anyway!!', and another wrote 'interesting, but not top of the list. Thanks ever so though!'. It was a nice sign that people are getting quite into the whole thing :) In fact one of my colleagues in the English department has requested that I bring in cookies every day and he doesn't care how crispy they are! Another comment said that they were good because they weren't too sweet but still flavoursome. The Scientist gave his oven-fresh sample a 7.5 - slightly under his average, but he did particularly like the crispiness and asked if I could spare another one. Overall the average was 5.2 but I don't think this reflects the condensed milk cookie's true potential in the hands of a more attentive baker!

I still had a bit of condensed milk left after all the baking and was very tempted to make Johanna's recipe for grubs (which I had never heard of before but which she talks so highly of that I really want to try them). But they need biscuits and in the end I had to throw the rest of the condensed milk away before I let myself eat it a teeny spoonful at a time whenever I opened the fridge before I could get to the supermarket! I'd like to try Tammy's cookies again with all the proper directions though, so I will earmark the grubs for the same occasion. Oooh, I can see an Antipodean baking night coming on.

The Kiwi One: recipe here

Sunday 9 November 2008

When the cat's away, the mouse will eat mushrooms (and tofu noodles)


I have been feasting on mushrooms while The Scientist has been away. I bought a fancy mixed box from the market on Sunday and they have been turned into a risotto, a fried rice and egg dish, and this good-dinner-dance-inducing tofu noodle dish. I read various recipes for mushroom stroganoffs and stir fries, and I don't really know what mine was in the end - apart from tasty. I knew I wanted the main tastes to be the mushrooms and tofu unadulterated by a tomato sauce, so in the end I kept it simple, stir fried the tofu, then separately cooked the mushrooms with a bit of soy sauce, garlic and stock, and then added the tofu back in to finish off, with a sprinkling of nutritional yeast for a nice cheese taste. I served it on noodles and it was just what I had hoped - very mushroomy and nicely cheesey. I was only sorry I hadn't made more for another day.


Stir fried mushrooms and tofu with noodles
About 100g of firm tofu, cut into squares
About two big handfuls of mushrooms (mine included shitake, enoki, chestnut and oyster), sliced into chunks
Clove of garlic, finely sliced
Stock
Nutritional yeast

Dust the tofu with some plain flour and a little paprika. Mine was still quite bland after cooking so I'd be more generous with the paprika next time - although the final dish was still tasty.

Heat a little oil in a wok. When it's hot, add the tofu and stir fry for five minutes or so, until just crispy. Remove tofu from wok.

Add a little more oil and stir fry the garlic and mushrooms with a splash of soy sauce for a few minutes. Add a little stock, just to cover. Cover the mushrooms with a lid and allow to cook for about five minutes. There should still be a bit of stock left in the pan.

Put the noodles on to cook. Add the tofu to the mushrooms and cook for a few more minutes. Add a bit more stock if you're worried it's too dry. The noodles should be cooked: drain and add to the pan with a sprinkling of nutritional yeast. Taste and season.

Boil water for noodles.

Friday 7 November 2008

The Great Cookie Research Project: The Bonfire Night One

I think I may give up my Cookie Research Project. I'm not sure I can better the cookie from this week - although the only credit I can take is in selecting a good recipe. I take my cookies in on Wednesdays, and since Wednesday last week was Bonfire Night I thought I'd do a parkin-inspired number. This also enabled me to legitimately use the word 'treacle' a lot, since it is one of the key ingredients of parkins and gingerbreads, and is also one of my most favourite words. Treacle is actually a very old word - it used to mean an antidote to poison, which is why springs with supposedly curative properties were sometimes known as 'treacle wells'. It's amazing what you learn when you have to give a lecture on pre-Reformation popular religion. Treacle is also mentioned in Alice in Wonderland - one of my favourite children's books - when the dormouse at the Mad Hatter's teaparty tells a story about a treacle well.


While treacle is a very good word, it is not a very tasty ingredient on its own, and so the batter for this cookie wasn't at all nice (though I did check, just in case). I'd been looking around for a gingerbread cookie when what should turn up in Dan Lepard's baking column in the Saturday Guardian, but - chocolate parkin biscuits. I haven't made any of his other recipes but I've been saving quite a few of them to try and he said that these cookies were crispy, which is what my colleagues seem to like. They involve a bit of melting, a bit of stirring, a bit of chopping of crystallised ginger, some oats, and then when the batter was cooled I put it in the fridge overnight so that I could bake them on Tuesday night. I was a bit worried this might have an adverse effect on a melted batter, but it seemed to do fine and actually made it very easy to handle.


The smell these cookies produced when they were baking was divine, and The Scientist was already hovering by the oven when they were ready to come out. He said that they were absolutely the best ones so far and rated them a 9. High praise indeed. They also scored amazingly highly with my colleagues - an average of 9.4 with all 9s and 10s. Comments were quite extensive this time - 'Scrummy!', 'gooey & very tasty!' and 'delicious, I liked the oats' were just a few. One of the French lecturers even stopped me in the ladies' to ask if I was the cookie baker and could she have the recipe as they were so good! I think they were so popular because they were very moist and very gingery. However, I do have a confession to make: between the chilling and shaping and chatting to The Scientist at the same time - *I forgot to add the chocolate chips*!! So they're not really choc chip cookies at all and as such I'm not really sure they should legitimately be part of my investigation. However, since they were so popular and blatantly stand alone with no choc chips involved, I am choosing to keep them in anyway. After all, my tasters couldn't care less what cookies I bring in as long as they appear in the kitchen. I really liked them too and I think that adding chocolate would actually detract from the oats and the ginger. I'd be interested to try it with chocolate another time to see. Especially if it gives me another opportunity to talk about treacle.

The Bonfire Night one: recipe here

Thursday 6 November 2008

Seven things

I got given an award by Heather from SLO cooking. Isn't that sweet - thank you, Heather!

I get to display this very pretty image, and have to answer these '7 things'. I have discovered that it's quite to think of as many as 7 things about myself. I must be very consistent (trying to avoid the word 'dull' there!). But here goes:

7 things I did before
1. Did ballet for almost 20 years (wow that seems long!)
2. Had a Guinea Pig Appreciation Club with Dogophile Vegan Nurse when we were at school
3. Told Kiwi Sis and Eco Sis stories about 'When we were in Mummy's tummy' on long car rides (Munchkin Gramps is a paediatrician - it's not as weird as it sounds)
4. Wore an orthodontic brace which had enough hardware to power a small house (Junior Sis has to wear one now; I sympathise)
5. Spent 7 years at university
6. Made the bridesmaids dresses for Kiwi Sis and Scientist Sister's weddings
7. Lived in 10 different houses by the age of 14

7 things I do now:
1. Provide lap services on demand for our cats
2. Bake more than we can possibly eat
3. Spend more time some days immersed in the eighteenth century than the twenty first
4. Blog
5. Sew baby quilts for my friends and family
6. Make random purchases from health food shops and farmers' markets
7. Love my Scientist :)

7 things I want to do:
1. Meet my Munchkinette niece
2. Visit the Norse God in Vancouver
3. Finish my current book project
4. Play my recorder more often
5. Train the cats not to moult on everything or scratch the sofa
6. Keep my little fruit trees alive to bear fruit
7. Try cooking with the pack of kamut I have sitting in the storecupboard

7 things that attract me to the opposite sex:
1-7: Being The Scientist

7 Favorite Foods:
1. Carob raisins and yogurt banana chips
2. Rachel's Organics rhubarb yogurt (but cow's dairy so I haven't had it in ages :( )
3. Mushrooms
4. Banana and vegemite on toast
5. The Scientist's leek and chickpea soup
6. Spelt and barley (and I'm hoping, kamut)
7. Nice fresh grainy bread

7 things I Say Most Often:
1. I think I dropped a needle...
2. Can I make you some dessert?
3. Could you fetch me x - I can't disturb the cat
4. I think you mean 'fewer' not 'less'
5. Aargh, I've run out of sugar/flour/butter/other vital ingredient for baking project
6. Can you explain what just happened in Heroes?
7. Has my hair gone frizzy?

I get to nominate some other people, but it's taken me so long to think of all these 7 things that I'm too exhausted! If you're reading this and fancy giving it a go, consider yourself nominated!